Let's meet August's Fabulous Sponsors!

Posted by om 0 comments


I'm a mixed media collage artist that loves everything vintage.  I went to art school, owned a brick and mortar store and now I enjoy the freedom of selling on line.  I use old photos, fabric, etc. in my art.  I live in an old house in Irvington, Indiana just a stones throw from downtown Indy with my nerdy husband and our little basset hound.  Vintage mixed with new and handmade makes for a warm and interesting home.


The College Tourist is building a national community by connecting college tourists and their college towns across America through our Million Postcard Project. TheCollegeTourist.com is a fun interactive site which allows college students to post a virtual postcard of the great things about their college towns. We embody the spirit of being a traveller both nationally and globally through uniting student's experiences of their college towns and global studies. In addition, our blog, speaks directly to the smart, savvy and fashionable college students who embrace the adventure of travel, life and fashion.


For 15% off use code:  HOLIDAY 

Hello! My name is Crystal & I am the owner of a fashion & family blog called, Billie Jean. I also have a small jewelry business on Etsy called, Billie Jean Jewels. The name, Billie Jean, is a combination of my two grandmother’s names, Billie Loree &  Sandra Jean, put together. I have a serious addiction to antique shopping & I am a huge fan of past decades. My grandmothers in any & every way inspire me & are my motivation to be the best woman I can be. I blog about my life in both Louisiana & Texas, my beautiful daughter & my handsome husband. I do also love posting about my home & my ever-growing closet. And with a huge collection of clothes, I can never seem to find anything to wear! One last thing, designer jewelry is a new passion of mine &  I hope that you guys can take the time to check out my shop! Enjoy the 15% off for Everyday is a Holiday readers! 


Hello, my name is Heather from vintage grey! I am a vintage girl at heart, and I’m always on the hunt for sweet treasures that I can bring back to life in my home, and in my handmade creations. I love to quilt, crochet, cross-stitch, embroider, and create pure crafty goodness. I am a Christian who loves Jesus, and each day I am seeking His will for my life. This year the Lord has lead me on a new venture of starting a blog and opening up a shoppe. Both have been such blessings! My little shoppe specializes in vintagey tea towels and other lovely goodies all made with re-cherished linens and modern fabrics to give your home a handmade, vintage touch. Would love for you to come by my blog and say hi!!


For 30% off use code:  jennyholiday

My name is Kara Haupt and I'm an artist, photographer, and design student. I spend my days blogging, designing, and hanging out with my cat. I love iced coffee and sketchbooks. 


My name is Laura McHugh and I love sharing my art, passions and creations on my blog.  Vintage2Glam is my idea of reusing colorful vintage finds, salvaging items most would consider old or used and turning them into something Glam. I Love recycling the past and incorporating these items into my own vintage inspired accessories and artwork with a modern twist.


Free Shipping in the USA, use code:  everydayholiday1979

Diana Gonzalez is a self taught collage, mixed media artist, writer and teacher, formerly known as The Craftaholic. Sometimes she likes to get crafty with her two kids and artist husband (whom often complains of having too much paint and yarn in the closets).


AamapolaA is Maria Jose, a Spanish economist passionate about handmade and crafts. It all started with a craft class to learn how to decorate wooden boxes that sparked my creative side and eagerness to learn to do things.
The shop is broad, from brooches, earrings, bracelets, pendants, necklaces, rings, purses, handbags, hairpins, as well as boxes, frames and decorative mirrors that we make on request. Each article is made ​​from a completely handmade process with great care and perfectionism, which makes each one unique and unrepeatable. 


Aloha, I live on the Island of Maui Hawaii. I am an avid surfer enjoying my days at the Beach with my family. By Trade I am a Professional Airbrush Painter for Timpone Surfboards Maui.  When the Surf is Small I am in my Studio with my Chihuahua Creating Mermaids, Fairies, Surf Art and More for my Etsy Shop.  To see more of my work visit my blog.


Here at The Glamorous Housewife I discuss all things pertaining to being an elegant wife, a charming mother, and an enchanting hostess. From cooking the perfect roasted chicken to setting your hair in curlers, I hope to encourage you into living an inspired life; because deep down, we are all glamorous housewives.
......................................................................................


August was a great month for blogging and a great month in general. I'm so happy to play host to all of these fab sponsors, who are wonderful artists, shop owners, fashionistas, writers, and moms. Please go and visit each one when you get a chance. 
I'm thrilled to be connected to these lovely and talented ladies! And I hope to pass that connection on to you guys. 

Ohhh and don't forget about this month's fabulous giveaway! You still have time to enter! :)

Happy weekend friends!
xo Jenny


Read More ....

Hello Spring!

Posted by om 0 comments


How perfectly gorgeous is that setting!
A beautiful white house, overlooking the water
surrounded by fields covered in Spring flowers.
I can see myself making daisy chains in the field
with my floral dress floating in the breeze.
Whiling away languid afternoons ~ 
reading romantic novels and sipping peach tea!
 
Melissah xox

Images via 1, 2-34, 5, 6

Check out my other blogs Scrapbook and Country Style Chic


Read More ....

Save a bunch, and pack your and/or your child's lunch(es)!

Posted by om 0 comments
It’s that time of year again… back to school! (I used to hate that commercial!). Anyway, back to school means back to routine, which for many, can be a very positive thing when it comes to diet quality. In addition to making sure your child eats breakfast, has healthy snacks, and a well-balanced dinner, make sure they have a healthy lunch! One of my biggest tips to both children and adults is to PACK YOUR LUNCH.

I recommend you make buying lunch a special treat for your child, just as eating out should be a treat for adults and NOT the norm. If your child is old enough, teach them how to prepare a healthy lunch, so that way you do have the excuse that YOU are too busy to make it. Packing lunch will create autonomy for your child, while also teaching them how to prepare food for themselves. Furthermore, if your child makes their own lunch, they will be way more inclined to eat it!!! I have been packing my lunch since I was seven years old (my mom will confirm) and I can tell you, I have packed my lunch and snacks almost everyday since! Another benefit of packing lunch is the amount of money you will save. If your child gets just the school lunch everyday, you are only spending $2.35-$4/day… but if they buy a-la-carte items, those prices can add up very quickly. Some of my adult clients estimate they spend up to $2,000/year on eating out for just lunch!

By law, school lunches (just the meal of the day- NOT a-la-carte items!) have to offer 1/3 of the daily recommendation for calories, protein, vitamin A, vitamin C, iron, and calcium, and <30% of calories from fat (<10% from saturated) on average for the week. However, a survey from 2004-05 showed that fewer than 30% of schools met the fat standard. A fruit and vegetable have to be offered each day, half of the grains must be whole, and only low-fat milk products are to be offered. On average, a school lunch in elementary school will provide 550-650 calories, and 450-600 calories for high-school.

While the school lunch is beneficial for students that don’t get much to eat outside of school, it may set up some students for weight gain if they are eating substantial amounts outside of their school lunch meal. Just look at your child’s school lunch menu, most of the items aren’t what I would consider “healthy” meals (e.g: nachos w/ beef, cheese & salsa, individual pizza, and a meatball sandwich, served with corn and canned fruit) since they are loaded with saturated fat and sodium. If you do allow your child to buy lunch, look at the menu and identify healthy options for them to select, ensure that they are eating the fruits, veggies, and dairy, or have them choose healthy a-la-carte items such as a sandwich on whole grain bread or a salad. 

The National School Lunch Program is incredibly valuable for underprivileged children and I am happy to see they are making significant improvements regarding the nutritional value of the meals. However, having your child pack his/her own lunch has incredible benefits and sets the stage for a good habit to last for life. If your child does pack lunch, just make sure you only have healthy options available, otherwise, their Lunchable, juice, and cookie meal will be comparable to eating pizza, canned fruit, and French fries. I recommend packing low-sodium lunch meat on whole grain bread, a low-fat yogurt, whole grain pretzels, and piece of fruit and/or veggies. You can also mix it up and have your child eat leftovers from dinner, create shish kabobs with veggies and chicken, use cookie cutters to cut out fun shaped tea sandwiches, or make wraps. The creativity of school lunch is endless!


Sources: www.fns.usda.gov/cnd/lunch/  School Nutrition Dietary Assessment Study III: Summary of Findings

Read More ....

Friday Favorites

Posted by om 0 comments


Happy Friday kids! So who else had a mega busy week? Yowza! Aaron and I finished up some pretty big tasks and started a bunch of little ones, what else is new? ;)   We had a great time putting together this week's AJ with J&A and are already gearing up for next week's. And we have a handful of super fun & cute tutorials planned for September that I think you'll really like. Gosh, I am so so ready for fall! I've been pinning lots and lots of Pumpkin recipes. Everything from Pumpkin Toffee Cheesecake ...Geez Louise! to Aunt Ruthie’s Butter-Crunch Pumpkin Bars, to Pumpkin Ice Cream! Oh yes and fabulous sweaters, and pretty Autumn scenery as well.  I mentioned that I'm an October baby right? :)

I'm totally ready for the weekend, ready for some baking, and organizing, and some movie watching. And of course blog hopping and wish list making. Speaking of...

This dress from Marc by Marc Jacobs is so up my alley. Totally channels my inner Wednesday Addams. I always go for black with sweet white collars. Part uniform, part storybook. Not for everyone...but this style really seems to be a go-to for me.  If I could sew you can bet I'd have a closet FULL of them.  Oh and I'm only dreaming here...as far as owning this, well till money grows on trees.


I just adore this print. My current sentiments exactly!


This adorable DIY bunny pinata stole my heart! I would love to make one to hang in the studio! Isn't it beyond cute? 


This porcelain ring is too darn cool! It's like a gum ball machine prize for grown ups! : )


This kitschy & sparkly planter makes me really really happy.  When Aaron and I had an antique booth (years ago) we'd always come across these super fun "JUNK" items...most of the time vases. I used to scour ebay for them...and wow some went for a ton! Such cool time capsule pieces! 

Okie Dokie... Let the weekend begin!!
XO Jenny


Read More ....

Summer At The Hamptons

Posted by om 0 comments


summer brights


Coral Story


How lovely to be spending the last of your summer weekends
at the Hamptons right now.
There would be long beach walks with the dog,
afternoon tennis matches with friends,
some leisurely sailing,
plenty of lounging by the pool and cocktails at five!
There would be summer tans to show off
this season's fashion brights.
Barbeque smells would waft through the air, the clink of champagne glasses
would be heard along with laughter and chattering as the sun sets
on a perfect weekend!

Melissah xox

Images via 1, 2, 3 by Coastal Style, 4, 5, 6 by Coastal Style

Check out my other blogs Scrapbook and Country Style Chic

Read More ....

Participate in MEATLESS MONDAY!

Posted by om 0 comments
The overarching theme in the development of the 2010 Dietary Guidelines was the push for a “mostly plant-based diet”. In fact, the executive guidelines specifically state:

“Shift food intake patterns to a more plant-based diet that emphasizes vegetables, cooked dry beans and peas, fruits, whole grains, nuts, and seeds. In addition, increase the intake of seafood and fat-free and low-fat milk and milk products and consume only moderate amounts of lean meats, poultry, and eggs.”

The mostly plant-based diet recommendation comes from a panel of experts who have come to a consensus regarding reputable studies that show people who eat this way tend to be healthier and have the lowest prevalence and risk of certain diseases such as diabetes, heart disease, and certain cancers. Additionally, by decreasing animal meat in your diet, you will save money (meat is expensive, beans are not!), and definitely help the environment. Livestock, particularly cattle, are not good for the environment due to methane emissions from the animals, waste, and grazing lands. It is estimated that just livestock contribute 18% to the world greenhouse gases, which is more than that of livestock transport. If everyone in the U.S. gave up meat one day a week, it’s estimated that would be the equivalent of not driving 555 billion miles- not bad, eh?

Contrary to popular belief, you can survive without eating meat. You can get complete proteins (those that contain ALL of the essential amino acids) by eating soy, hemp, amaranth, and quinoa. You can get all your essential nutrients and proteins by eating a well-balanced diet full of whole grains, fruits, veggies, nuts, seeds, beans, and other natural plant-based foods. Also, giving up animal meat doesn't necessarily mean you have to give up all animal products, you can certainly indulge in milk, eggs, and fish if you choose to. For those that eat red meat (ground beef, steaks) regularly, instead of making meatless Monday the one day you don't eat red meat, try to switch that around to picking one day once a week that you will have one (4 oz.) serving of red meat... and even less frequently if possible.

My recommendations:
Have your family participate in Meatless Monday (or any day!) every week. Get creative with beans, nuts, seeds, quinoa, tofu, edamame, and other healthy sources of vegetarian protein! Be sure to stock those veggies high too, most people don’t come anywhere close to the recommended 2 ½ cups per day!


Sources: USDA 2010 Dietary Guidelines for Americans
U.S. Agriculture and Forestry Greenhouse Gas Inventory: 1990-2005
FAO. “Livestock Impacts on the Environment.” 2006
The Environmental Working Group

Read More ....

Art Journaling with Jenny & Aaron Class #4

Posted by om 0 comments


Welcome to Week 4! We feel like everyone involved is gaining momentum and ready to make bigger bolder statements. This week's spread is all about having fun. It's loose, bright, and perfectly random. Make sure you pull out some things you love...colors that you absolutely live for...images that capture the essence of who you are. There aren't any rules...but these are the "rules" for this week: Make your pages personal. Say what you want to say. Make them YOU.

Who's ready to have some FUN?!!


As with last week's class, we made a video slide show. Of course on it's own it only gives an idea of each step, so we included full detailed instructions for you to follow along. In the upper left corner of each photo in the slide show you'll see a title. In the instructions we've titled each step with those same titles so that you'll have an image to match each step. You can view the video once, or twice, or more...pause where you'd like, rewind, fast forward...watch it here on the blog, full screen, or on youtube. 

..............................................

gather your elements. It's great to have an arsenal of favorite things. Scrapbooking papers, bits of vintage wallpaper, stickers, trims, old photos, etc...But the real fun starts when you start to gather the few things that will define your spread.

prep your pages. We're working in a Moleskine, so the pages are thin and need to be bolstered. We actually covered both pages with Kraft paper and then coated one page with gesso. To do the Kraft paper (or postal wrapping paper) Just cut a piece that's a tiny bit bigger than your page and adhere with decoupage medium. Rub until all the wrinkles and bubbles are gone. Let dry. Once dry then apply a thick coat of gesso to one page. Let dry.  After your gesso is dry run a piece of masking tape down the seam of the journal. This actually does reinforce your binding and it makes for a smoother transition from page to page.
 
apply gesso with a palette knife. On the page with the raw kraft paper we knew the focal point was going to be in the center of the page so we were only interested in putting gesso in the center. We were going for a messy, piled up look so we applied a thick coat of gesso with a palette knife. This textured effect worked even better because we used gesso by Deco Art, which is super thick and heavy.

crosshatch your gesso. simply run your palette knife through the gesso on the page in opposing directions. I did vertical and horizontal strokes. You can also go diagonal. Do this to your desired effect.

grab a stamp. We like to vary the ways that we bring pattern to a page. Patterned papers are great but you want to add variety...sometimes stencils are called for...and in this case we used a big stamp with a polka dot pattern.

stamp a pattern. We went for a messy, spotty, sketchy look. Haphazardly brush paint onto your stamp in varying shades. Then stamp down in an equally haphazard manner.

repeat on other page. When switching to the opposing page we changed from tan paint to aqua.

speckle. We use a #6 round brush...load it with the watered down paint...hold the brush a few inches above your page...and just tap the metal end with your index finger. Do it to your desired effect. We love speckling for it's imperfection. It's messy and haphazard and perfect in it's own way.

adhere papers. After selecting papers and choosing where they'll go on your spread, then it's time to make your final tears and cuts and adhere them to the pages. To adhere papers brush on decoupage medium and lay the papers on the wet medium. It's better to be generous with the medium. If you apply too little you won't get good adhesion. Smooth and rub to eliminate ripples and bubbles. Now that the pages are dry, apply a sealer coat of matte gel medium. I use Golden brand. Let dry.

more speckles & gluestick dots. Again, speckling is no exact science. You'll see all sorts of drips and spots of paint on these pages. I even loaded the brush with watered down paint and then squeezed the bristles while holding them above the page, forming tiny puddles of wash on the page. Be careful to hold the book flat if you don't want the speckles to run. Blow dry from a safe distance to speed up the drying. Also, once again I dipped a gluestick in paint and made spots wherever necessary. 

cut image in half. I chose a large flower from a piece of scrapbooking paper and cut it in half. I did this because I wanted the image to come on and off the page, thus spreading out the floral theme.

adhere to top & bottom of page. Just line up either straight edge with the edge of your page and adhere onto opposing ends of the page.

trace circles. We used a clear cap from a can of picture hanging brackets to trace circles onto the page. Trace wherever you think you need a big spot of solid color.

paint in circles. We used a #6 round brush to paint in our circles with aqua and pale pink paint. It only took one coat because it was quality paint. You might need two coats if you want a solid look.

washi tape time! Washi tape is a great way to add color and pattern wherever your layout is lacking.

apply tape to seam. When working in a moleskine or any bound journal, I always add washi tape to the seam. It's just my personal preference. To me it just looks right.

adhere papers.  After assessing the pages more I decided more papers were needed. Adhere them where necessary, let dry and then apply a sealer coat of matte gel medium. Let dry.

distress edges using paint. We love to "distress" the edges of our pages with paint. This process is very imperfect. Just dip your thumb or finger in paint and rub the very edge of the page.

add paint wherever it feels right! As I said above with the speckling...add more paint wherever you think a pop of color is needed. And experiment with methods. There are no rules.

pause to show that we are  creatures of habit. Midway through the process we realized that our pages looked exactly like our living room. But in a totally indirect abstract manner. Each element is mimicked by another element. And this was totally unplanned...total coincidence.

grab your Sharpie pen! I've said it a million times...Sharpie pens are great for Art Journaling. Little bits of black are always welcome in my book and fine line details add another layer of texture.

doodle some words. We wanted one of our pages to feature one big statement in clear bold letters. A font like this is easy to do...take a look at it, give it a try...I'm sure you can do an equivalent. Write it in pencil first on watercolor paper. And once you've got it right, then trace over your pencil lines with Sharpie pen. Then cut out each word.

cut out your main image. We adhered our pic of Lia Lane's painting to a piece of watercolor paper, let dry, and then cut it out with decorative edged scissors.

 adhere. Adhere it to your page, creating a large focal point image. We pressed down the image using a clean dry paper towel, just to be careful not to mess up her face with our bare, could-be-sticky fingers

adhere words. Words are a great focal point because they can be spaced however you like...do whatever works for the page.

needed white speckles! Yes, just when you thought the speckling was over...we just needed a pop and splash of white.

sequins! We had this black sequin trim but we only needed a few single sequins...so we just pulled them apart.

add sequins. Sequins are great when you've already got a polka dot theme going on. They add texture and shimmer. We adhered ours with little dots of plain old Elmers glue.

gold stars! I told Aaron to look for some gold star stickers the next time he went to Staples. Sure enough, they had 'em, in the teacher's section. I love a gold star every once in a while...it bolsters the self esteem.

gold stars & sequins! It really is the little things that make all the difference. These silly details give the spread it's mood...it's attitude.

looking good! It is looking good...but another layer seems necessary.

add some trims. That's what was missing...fabric. This tiny bit of lace trim...a little rick rack...and that itty bitty strip of leopard print paper! They make all the difference. To adhere the fabric bits we dabbed the lace and the rick rack with Elmers glue.

Hooray! This is a bold spread. It shouts but doesn't scream. It's big and fun...with oversized images and tiny details.

...............................................

Supplies used on these pages:

Papers used:

 black and white floral - Hambly "garden party"
aqua damask - Hambly "mini brocade"
leopard print - me & my BIG ideas
pink and white stripe - 
*this was a piece we had and couldn't find the name but if you'd like a paper very similar  try: Echo Park "Homefront Dots & Stripes Collection"

watercolor paper
 kraft paper or postal wrapping paper
 photos of personal art collection, artist Lia Lane

Assorted mediums and tools: 

palette knife
 Sharpie pen
 assorted acrylic paints by Blick and Golden
 matte gel medium by Golden 
Blick gesso
Deco Art gesso
sequins
 gold star stickers
 assorted washi tape
 large polka dot stamp by Inkadinkado
 rick rack
 vintage lace trim  
...............................................


Thanks so much for joining us this week! We are having a lot of fun...and from the blog link ups and emails we're receiving it looks like you guys are too. Lets spread the word...tell your friends...and feel free to grab the above button to display on your blog or facebook page.
And once again, if you've done any art journaling this week and if you will be this coming week...come back here and link it up below. 

xo, Jenny & Aaron


Read More ....

Hooray for Jennifer!

Posted by om 0 comments

I just had to share this with you guys! One of our dearest dearest friends Jennifer Paganelli of Sis Boom fabrics fame is featured in a Downy Commercial. I was crying when I first watched it... and well, I was crying the 2nd time I watched it too! And then just HUGE SMILES!! I am super duper happy and proud of this gal! She is so talented and so REAL! What you see here in this commercial is such an accurate portrayal of the actual Jen Paganelli working and dreaming in her beautiful home and studio. Though every time we visited Jen's home the entire downstairs was a glittery wonderland filled to the rafters with her wares (yes, right in her house she held amazing shopping events where she'd debut a lot of her latest fabric collections and offer up about a million handmade crafts!) And we'd see her studio in full swing creative mode...buckets of glitter strewn about, vintage Christmas ornies, doll parts, and a dozen glue guns lying around, still warm from the countless projects undertaken over the preceding weeks. Anyway, like I said...this bit of video captures Jen perfectly and in case you guys haven't seen it yet I wanted to show it to you here.

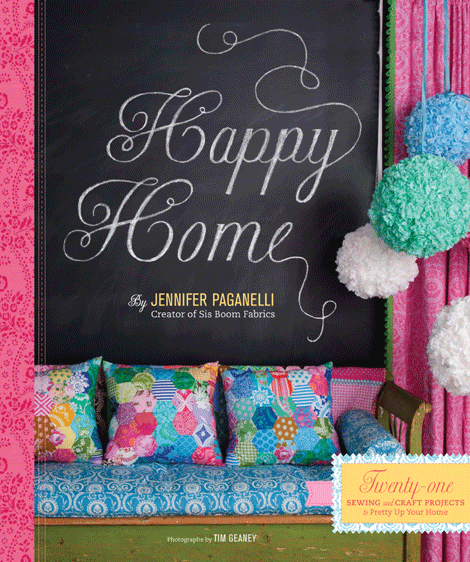
 Also, if you haven't yet seen her amazing book "Happy Home", here it is below with a brief descript...


Her best selling book Happy Home.

Jennifer Paganelli designs one of the most popular fabric lines in the marketplace. In this gorgeous collection, she shows readers how to whip up twenty-one beautiful accessories to transform their space into a sunny, happy home. Each project showcases Jennifer's fresh, whimsical style—from luxe drapery to cheery tablecloths and napkins. Featuring simple step-by-step instructions, a comprehensive glossary of techniques, pattern sheets tucked into a handy front pocket, and lush color photos, this book makes it exceptionally easy to pretty up every room in the house.
............................

 Ok, just thought I'd share one of my dear friends with you guys. Tomorrow is Thursday and that means another installment of Art Journaling with Jenny & Aaron. We had so much fun with this week's class! Midway through we realized just how much our pages resembled our home decor...it's pretty funny actually...you'll see what I mean once you see the video.
Alright, 'til tomorrow. xo, Jenny


ps...I sat this week out of Wonderful Wednesday, but the gals are still partying and blog hopping! So go join the fun!!


Read More ....